Introduction
Over the period in Electronics Hub, I have implemented a variety of robots like Hand Gesture Controlled Robot, Obstacle Avoiding Robot, Line Follower Robot, Robotic Arm, Remote Controlled Robot, etc. All these robots have few things in common like a Microcontroller (Arduino UNO in most cases), a Motor Driver (L293D or L298N), couple of motors, chassis etc. But the robot I am about to build doesn’t require all the fancy electronics or programming.
Idea behind DIY Walking Robot
The idea behind this DIY Walking Robot is that you don’t need costly robot chassis or the above-mentioned electronics to build a working robot. A simple mechanical structure with a small rotating part (like a motor) is sufficient to successfully build a robot. Without further delay, I will jump to a step-by-step explanation of building this DIY Working Robot.
Constructing the Walking Robot
Motor and Battery
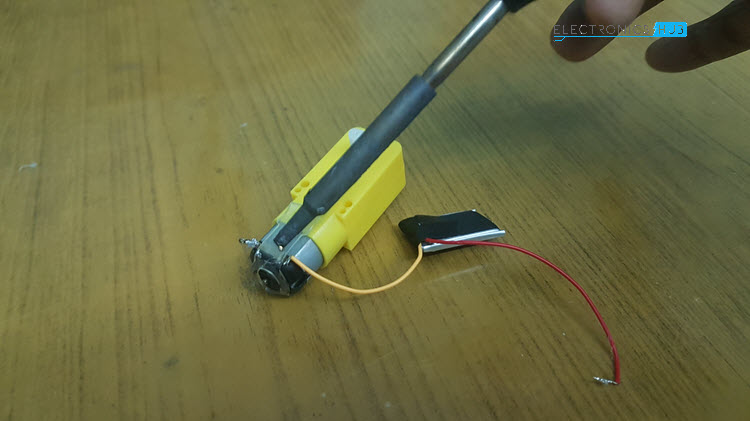
The important part of this robot is the motor. I have used a 5V 150 rpm geared motor. To power this, I have used a small Li-po battery. You can use a switch in series with the battery and the motor but I have connected them directly. Make sure that the motor has a dual sided shaft, the small white plastic piece where you usually connect a wheel.
Also, I have fixed the battery on the back of the plastic casing of the motor so that it stays firm without wobbling.
Getting the Popsicle Sticks Ready
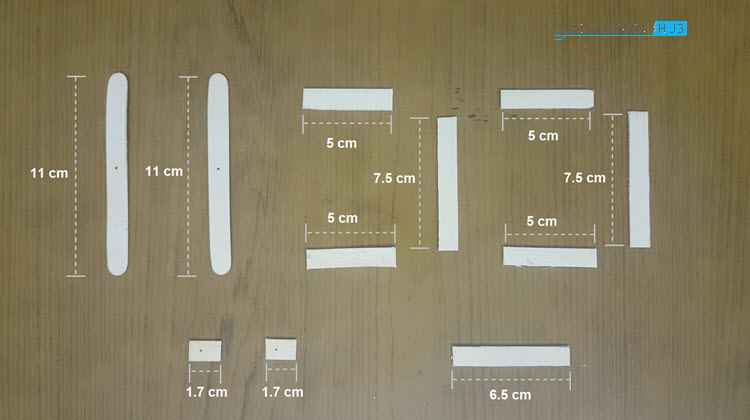
The next step is to take a bunch of ice cream sticks (popsicle sticks) and cut them into the following specified shapes and sizes.
These numbers are just based on trial and error and you do not have to follow the exact specifications. Pierce holes at the center of both the 11cm sticks. Also, pierce holes on the 1.7cm sticks, not at the center but slightly off.
Connecting Sticks to Motor
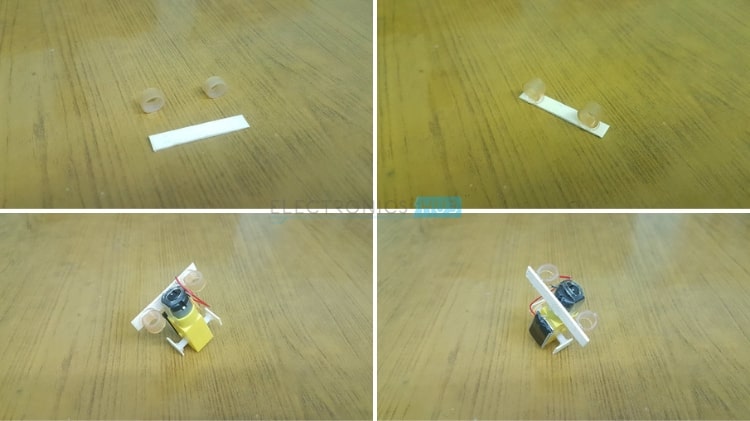
Now, take the two 1.7cm sticks and connect them as shown below so that the pierced holes stay on the opposite ends. This is important to simulate the walking effect.
Now take the 6.5cm stick and fix two rubber tubes as shown in the image. The legs pass through these rubber sleeves. Fix the 6.5cm stick to the motor as shown in the image.
Building the Legs
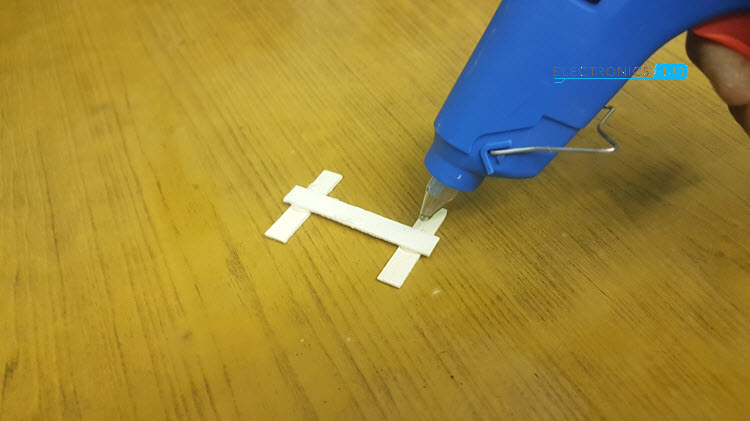
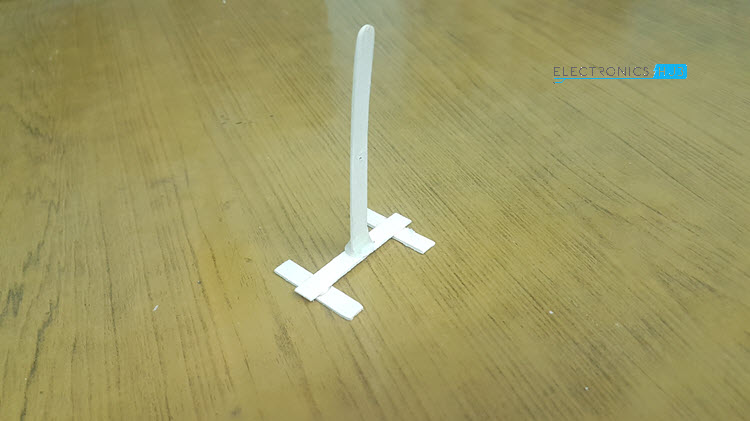
The next important step is to build the legs of the Walking Robot. Take the two 5cm sticks and fix the 7.5cm stick as shown below. This structure acts as the base of the leg.
Now, for the actual leg part of the robot, take the 11cm long stick and fix it to the center of the base structure i.e. center of the 7.5cm stick.
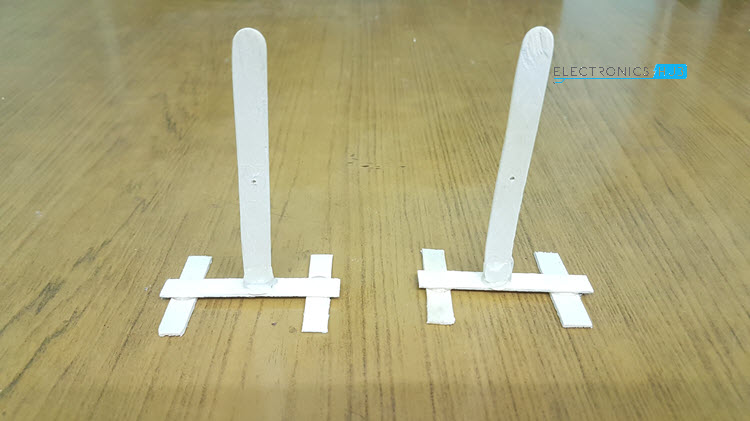
This whole structure makes one leg of the robot. Now, make an identical structure as the other leg using the similar sticks. This section completes the leg part of the robot.
Attaching the Legs to Motor
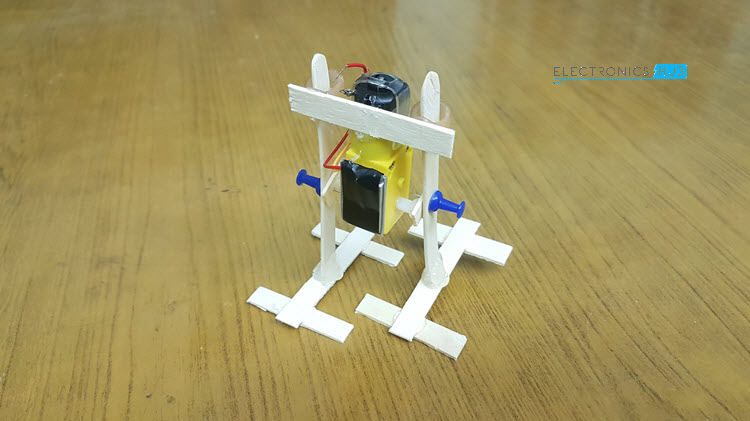
Now take one leg structure and try to fix it to the motor. First, slide the open end of the leg into the rubber sleeve and at the center, where the earlier pierced holes meet, place a thumb pin or something similar to hold the leg onto the motor. The thumb pin also allows the leg structure to freely move at the pivot point.
Now take the other leg structure and place it on the other side of the motor. The final structure looks something like this.
Make the Robot Walk
After confirming all the joints are glued properly, you can start the motor to test the Robot. In case you used a switch, turn on the switch and the motor start rotating. Due to the mechanical structure of the robot, the rotation of the motor’s shaft, transforms into a to and fro motion of the legs of the robot. Since the legs are placed at a different angle, when one leg is forward, the other leg is at the back and the rotating motor will cause them to change positions alternatively, and a walking motion is simulated.
Conclusion
A simple DIY Walking Robot without Arduino or motor driver is designed and constructed in this project. This can be a fun project for kids to get interested in robots and as it doesn’t involve any electronics and programming, they can easily build one. Comment * Name * Email * Website
Δ
![]()
![]()
![]()


![]()
![]()

